Showing posts with label sweaters. Show all posts

Tuesday, January 26, 2016

January Spending Freeze, Day 22: Two little girls teaching themselves to sew

For Christmas, Suzi's aunt and uncle got her a really cool craft/sewing set.  It includes pre-cut pieces of felt and instructions for projects, along with needles, thread, pins, beads, and more.  She loves it.  Shortly after we returned home from Christmas traveling, she took it up to her room and spent several hours working with it.  She has sewn things before, both with me and independently, but this kit really seemed to get her motivated in a new and powerful way.  When she finally came downstairs, she proudly showed me an adorable little owl she had made all by herself.  "You know," I said, "you can take any fabric, cut it to make anything you want, and then sew it with the tools in your kit!"  Anytime I sew a project and have a bit of fabric left over, I put it in Suzi's fabric bin.  I especially like to give her sweater or t-shirt scraps and fleece, because they do not require hemming--the edges will not unravel.

A few days later we read The Lorax, one of the kids' favorite Dr. Seuss stories, and Suzi was inspired!  She ran up to her room, and a while later presented me with this adorable little guy, crafted from one of her Dad's old t-shirts, two buttons from Grandma, and a couple of felt pieces from her sewing set.

He speaks for the trees.


Ivey wanted to do some sewing too, so I said sure!  Suzi gifted Ivey her old, smaller sewing kit with threads and a little thimble, and I found her a dull needle.  She found a leftover scrap of fleece and made this.

"Bunny" by Ivey


As I was looking around for cashmere sweaters to start a project of my own, I stumbled upon some cashmere scraps I had meant to give away a few months ago.  I had been crafting simple little dolls to sell at craft fairs, but after I decided to give up crafting for profit, I realized I was never going to use up all those little pieces.  I gave the girls one large ziploc bag each of various colorful, soft, fluffy scraps--perfect for small, easy projects.  It's already kept them busy for hours practicing basic hand-sewing skills on their own, which I've always felt is the best way to learn.  They do not want their mother hanging over them, telling them a better way to do this or that, and stopping them from making mistakes they could learn from.  I offer tips and help when requested, and then send them off to enjoy themselves.  There is literally nothing to lose, nothing to waste.  This little pursuit is a spending freeze win for them and for me!

Saturday, January 23, 2016

January Spending Freeze, Day 20: New toys for our cats without spending a dime

Our three kittens.  Not as innocent as they look.


Ever since we started the spending freeze on non-essentials, I've kept a running list of everything we did spend money on.  As soon as I started the list, I knew we would have one conspicuous category (no pun intended, but Jordan found one) that would keep popping up, and it hasn't disappointed:  cat stuff.  We do have five cats, so this was bound to happen.  We have two dogs as well, but somehow the cats cost significantly more; I think the litterboxes are partially to blame.  From December 27 - January 23, the time of this writing, we have spent a total of $183 on cats alone.

$183 in less than a month, on cats--and we didn't buy toys or silly outfits or anything frivolous at all.  Normally it wouldn't be so high, but our eldest kitty is sick.  We've taken her to the vet quite a bit over the past several months and have been back a few times to buy more medicine and prescription cat food.  With a full blood panel and later an ultrasound, our kitty spending for November and December was much higher!

One thing I do to help lower our cat expenses is buy our cat food by the case on Amazon.  For Fancy Feast and probably several other canned foods, Amazon offers the best price and free shipping to Prime members.  Prices fluctuate wildly on Amazon, so I track all our preferred types of cat food on camelcamelcamel.com and get an email when a price drops unusually low.  When it does, I buy 3-4 boxes.  We have an Amazon Rewards credit card, and often use our rewards points to buy cat food or cat litter.  Our favorite cat litter has been ridiculously overpriced lately, so we're going to have to look for it locally.

We try to only buy decent quality cat food, and natural litter that will not be a respiratory irritant to us, our children, or our pets.  I'm not willing to skimp on things that will cost us more (or cost us more than just money) in the long run.  So, yes, the cats are relatively expensive.  But there are certain things our cats love that don't cost a lot of money.

Our three not-so-little kittens are now about eight months old and incredibly rambunctious.  They tear around the house chasing each other, bouncing on and off the furniture as they go.  If they get bored or if their curiosity is not redirected sufficiently, they can be destructive and extremely annoying.  But, thankfully, it doesn't take much to entertain them!

Boxes are a favorite.  Anytime we get an Amazon order (usually of cat supplies) I put the empty box in the floor for them to enjoy for a while.  A few months ago I even made them this cardboard box funhouse.  It only took a few minutes, and they still play in it sometimes!


But today I decided to use up some of my wool sweater stash and make a few simple catnip toys for them to play with.  I already had the catnip--months ago I paid $4 or so for a big bag of it at a local shop where they sell bulk herbs.  Sometimes I make fancy novelty cat toys, but the cats honestly don't care much what their toys look like.  They will end up dusty under the couch no matter what.  So, I simply cut circles about 6" in diameter, and loosely stitched around the edges with some wool yarn and a big needle.  I put 2-3 tablespoons of loose catnip in the center, placed some little wool scraps on top (this will help keep the loose catnip contained), then pulled the yarn to gather the circle into a drawstring pouch.  Finally, I tied it off tightly and trimmed the yarn.  I made five or six...  Not sure exactly, because as soon as I finished one I'd toss it to a kitten and they'd carry it off!

Clemmy got the first toy, but Pumpkin stole it


Please excuse the shoes, socks, and junk in the floor


The toys are now scattered around, and occasionally a mischievous kitten will spot one and play with it for a little while instead of, for instance, finding a roll of toilet paper to shred into bits.  I really need to come up with a few other good ways to keep them occupied and entertained.  Maybe a toy rotation.  It didn't work for the children, but maybe it would for the cats!

Monday, February 3, 2014

How to make dryer balls out of wool sweaters


Have you heard of dryer balls?  They are wool balls, generally made of yarn or wool roving, that you throw in the dryer with your wet clothes.  They can be used instead of dryer sheets, reducing static cling.  But more importantly, they SAVE ENERGY by absorbing some of the moisture in your clothes as they dry!  Our power bill has been annoyingly high, especially during the cold part of this winter.  I've been wanting to lower it, and I've also wondered for a long time if I could make dryer balls out of old sweaters.  Sweaters are one of my favorite craft materials!

One day some time ago, I came across a pin on Pinterest showing how a lady had done this.  I repinned, but when I finally got ready to click through to her tutorial, the entire blog refused to come up!  Maybe it'll be back someday?  Anyway, I was inspired by a photo from An Owl's Nest.  Here's how I made some dryer balls out of old wool sweaters, and used up a bunch of scraps!

1)  Round up: 

--Your scrappiest wool or cashmere scraps (mine were left over after I made a Valentine wreath*)
--A thick wool sweater or two--some holes are fine, doesn't matter if it's crappy-looking
--A nicer-looking wool sweater with some decent non-holey sections for the outside of the ball
--Embroidery floss in complimentary colors
--A needle and scissors, of course  :-)

My tiniest scraps, excited to fulfill their destiny

Your sweaters should preferably be clean already, because you don't HAVE to wash and felt these after they are made.  I've done both.  It's optional.  Also, for this project I would not compromise on sweater content.  I used some cashmere for the scrappy core, and the rest 100% wool.  I would recommend avoiding any percentage of polyester, nylon, acrylic, etc., just to be sure they work properly.

2)  Go ahead and thread your needle so it's ready when you need it!  Cut your crappy-looking, possibly holey sweater into long strips.  Grab a handful of your scrappy-scraps and squish them into a ball, then begin tightly rolling as shown.  Keep adding strips until your ball is the size you want.  Mine ended up about softball-sized.  Bigger balls are easier to find when mixed in with clothes in the dryer.


3)  Once your ball is a good size, sew the end of the last strip tightly to the ball with embroidery floss.

  
But WAIT!  Before you go on to the next step, there's another option you could choose.  If you have a little wool roving and would like a more traditional dryer ball, you could apply your roving to the ball you already have.  Just pop over to Crunchy Betty's felted wool dryer ball tutorial and pick up at step 2.  It's a genius way to save on expensive roving while getting a dryer ball that looks about the same!  But if you'd like to continue with sweaters only, go on to step 4.

4)  Now you are going to sew a snug-fitting tube to serve as a case for the ball you just wound up.  So, pull a piece of your nicer-looking wool sweater around the ball to measure where you need to sew, and sew right sides together with your embroidery floss.  Be sure to make the tube an inch or two longer than it needs to be to fit around the ball, because we will be turning the edges under in the next step.

Mine happened to be a sleeve that was a bit large.

When you cut the excess off, be sure to leave enough that it doesn't unravel!  Then throw that cut off piece into the scrap pile for your next ball!

Turn it right side out and try it on your ball to see if it fits.  It should be tight.


5)  Now that you have a well-fitting sleeve, grab one end and turn the edge down to the inside.  We are going to sew a few big stitches around that edge to gather it up.


6)  Pull it tight!  Once you get the first knot tied, tie a couple more to be sure it doesn't come undone.  Then you can snip the thread off.


7)  Repeat steps 5-6 on the other end.


8)  Explain to your ball-loving son that the ball is for the clothes dryer, not for him (if applicable).  He took off with a couple of my first ones and crammed them into his sister's hot pink Barbie convertible.  I'll make him some balls later.  I have plenty of material!


9)  Try them out!  If you'd like the outside sweater to felt up a bit, you could wash it on hot and dry it a time or two.  It might turn out even nicer if you tied it up in pantyhose first (not sure, because I didn't try that).  You don't have to wash it, though.  I was just as happy with the ones I threw straight into the dryer and began using immediately.

These I washed and dried.  They are a little linty.


I haven't been using these long, but I have been able to significantly dial down the time my dryer runs.  I even washed the kids' sheets today, which normally take extra dryer time, and they dried fast!  I think there is also less static, but I'll need more time to say for sure.  Sweater balls are a bit lumpier than traditional dryer balls and not quite as pretty, but since they spend most of their time in my dryer, it doesn't really matter.  Also, if they ever start to come undone, they'll be super easy and cheap to fix!  I'm pretty happy with how this little project turned out.  Can't wait to see our next power bill.


 *Here's the Valentine wreath.  Made it with a coat hanger.


Friday, October 26, 2012

How to sew a candy cane table runner


I love decorating for holidays, especially Halloween and Christmas.  I do not, however, love to spend a lot of money.  This year I decided to try making table runners out of my favorite crafting material that I always have on hand:  upcycled wool!  For this project I used a pair of red wool pants and a white wool blazer, probably both found in the clearance section of Goodwill.  I chose these fabrics because they are thinner than sweaters and woven rather than knit, so they don’t stretch much.  I’m sure you could use a wool sweater, but I’d be careful about substituting synthetic material such as fleece for this project.  If you do try something like polyester fleece, skip the ironing—it’ll melt.  You probably already knew that, but I learned it the hard way.  Yuck!

Once you’ve found some material that will work, you’ll also need your scissors, a sewing machine threaded up in red, and preferably a cutting board, clear ruler, and rotary cutter.  You’ll also need your iron at the end.

I decided I wanted my table runner to be 7-8 inches wide, so I cut a piece of folded fabric to that width with the rotary cutter.  The fold is at the bottom.  

I then used a piece of chalk tied to a string to mark off a curve for the two end caps of my candy cane table runner.

After cutting along that curve, I used the clear ruler and rotary cutter to cut the end cap at an angle.  Now we are ready to cut the pieces in between!

I laid them next to the first pieces and used the clear ruler as a guide to be sure I was cutting them to the right width and at the right angle.  

Once I had enough in red and white, it was time to sew!

To properly position the pieces so that they are right sides together for sewing, simply grab the lower piece and flip it up onto the piece above it.  But WAIT!  You can’t sew them together with the edges matched exactly, or the whole thing will be a little bit off.  What’s important is that they align on the seams once you’ve sewn them all together, and there's about a 1/4 inch between the edge of the fabric and where you are sewing.  Line it up with the edge of the presser foot.

Perhaps a better way of explaining it is that you should leave a pointy little cat ear poking out each time you sew two pieces together.  You want the needle to start sewing just to the left of the cat ear.

And hopefully when you come out on the other end, you’ll see something like this!

Once you have all the pieces together, it should look something like this.  It doesn’t look its best yet because we still have a couple of steps to go!


It's time to warm up your iron and iron those seams open.  (Remember to be careful with this if you are using a substitute material such as fleece!)  Ironing the seams open will help the runner lie flat on the table.  Finally, once you're done ironing, trim off all those little triangles that are poking out and while you're at it, even out any areas that might need it.

 Done!  No need to hem.  Lint roll it or wash it by hand if it gets dirty.  It shouldn't fray too much--you can always trim the edges a bit if needed later on.  Just place your favorite holiday decorations on top of your table runner and you're good to go!


P.S.  Because it is cut at an angle, this table runner is a bit trickier than the table runner I made for Halloween.  If you wanted a faster, simpler project, you could skip the candy cane motif and sew one like this in Christmas colors instead.

A snowman inspired by the penny rug


I first came across the concept of the penny rug on Pinterest, and it was love at first sight.

Have you ever approached Christmastime with a longing to give each of your loved ones a special gift, yet had very little money to do so?  Have you ever thought about making gifts, only to find that the cost of materials may also be beyond your budget?  Here is what I believe about gifts:  An investment of time, energy, and love can yield a special gift in the absence of money, even if you are not particularly crafty or artistic, and even if you do not have expensive machinery at your disposal.

That is why I *heart* penny rugs.  For a delightful assortment of examples, do a Google image search.  A tradition from the 1800's, the penny rug was a hand sewn craft intended to use up the smallest of wool scraps to create something beautiful and warm.  I have read that the penny rug is so named because women used coins as templates for the small wool circles.  I have also read, though, that coins were sometimes sewn under the pieces of wool to ensure that the finished project would lay flat.  For more on the history of the penny rug, visit this page at Rag-a-Muffin Collectibles and this one at Layers of Meaning.

So, to review, this is a craft that:

Has inspiring historical roots
Allows a crazy sweater lady (me) to use up wool scraps
Costs practically nothing
Fills small bits of spare time
Allows me to get creative and play with a rainbow of wool

Yes, I knew immediately this was the craft for me!  After spending some time online admiring some beautiful penny rug designs, both antique and modern, I was inspired by an adorable snowman (which I unfortunately can no longer find, or I would link to it) to make a table runner/chair decoration for a snow lover on our Christmas list.

Want to try to make a penny rug for someone on your Christmas list?  The most commonly used stitch is the blanket stitch.  This is what I used for my snowman project.  It was frustrating at first, because while I knew how to blanket stitch on the edge of material, I quickly realized that blanket stitching for applique in the middle of a piece of fabric is different.  This Patchwork Interactive video explains it beautifully.  She is not working with wool, so you can skip to about 2:45 for the relevant part of the demonstration.

Other than the ability to blanket stitch and some very basic hand sewing skills, you will need:

a decent pair of scissors
a large-eyed needle
embroidery floss
various felted wool scraps
something (like a coin or cup) for a template, or material (such as a cereal box) to make your own
one large piece of fabric for backing

For my backing, I used a piece of wool blend storebought felt I already had, but there are lots of things you could use.  Centuries ago, women used things like burlap sacks!  In a truer, more traditional penny rug, the backing will not show much anyway.  My project is more penny rug-inspired.  I cut my backing about 10 inches wide and 30 inches long, with a point at each end.  I was thinking it could be used as a table runner or to decorate the back of a chair.

I then used a large jar lid as a template for a dark blue circle, which I blanket stitched to my backing.


It only took a small handful of scraps to cut out the basic shapes for my snowman!  All that was left was to blanket stitch my snowman onto the background circle and add some details.  I did secure the bottom of the head and middle snowball with matching thread, since I did not blanket stitch that part--and I did the same with the bottom edge of the hat.

The process of stitching it all together and adding details such as snow and twig arms was a relaxing while-watching-TV activity.  It was what I'd imagine knitting or crocheting feels like for some people.  Also, I should probably mention that I have no formal embroidery experience.  I watched that blanket stitch video and have applied embroidery to several projects in a trial-and-error sort of way.  You can wing it!

Again, this snowman project is really only inspired by the penny rug.  I am currently working on a more traditional project for someone else's Christmas gift, but it'll be a while before that one is finished!  The general concept can go wherever your imagination wants to take it, and can be personalized for almost anyone on your Christmas list.  I think it would be so neat to find an old, unusable article of family clothing, such as a moth-damaged coat that belonged to your grandmother, and use it as material for this historical craft.  I definitely see several variations of this technique in my crafty future!  I hope you like it, too.

Thursday, October 11, 2012

10th Kissiversary and a Halloween table runner

I am actually posting this Friday morning, cheating by dating it the 11th.  But the reason I didn't get to post yesterday is that Jordan and I were celebrating our Kissiversary.  Ten years ago we had our first kiss! Who would've guessed on that October night when we were both 18 and watching a movie in his little college apartment that in ten years we'd have three kids together?  Three!  Wonderful kids!  It's kind of amazing.  And my Jordy is amazing.  I love him so much.


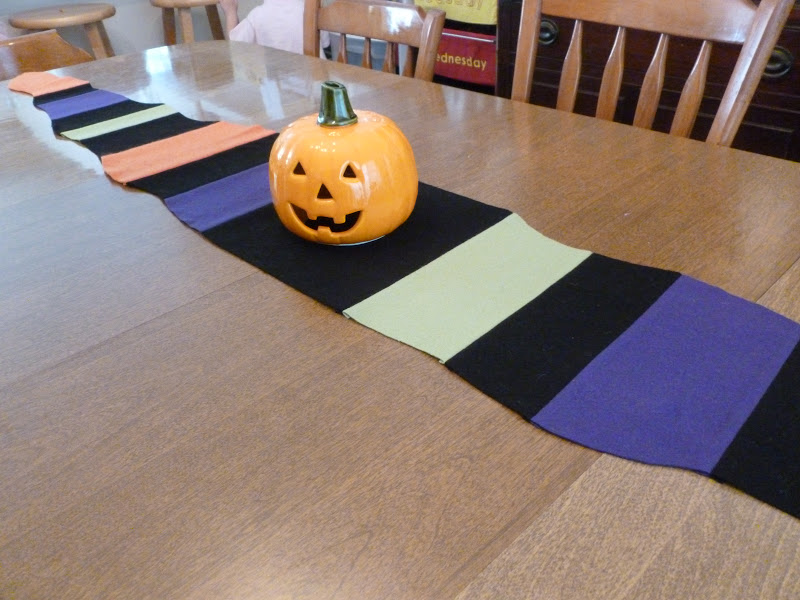
Also, I made this table runner.  The dining room table really needed a little something, and I think this does the job.  I used upcycled wool I already had, and it was so easy!  I just sewed a bunch of rectangles right sides together, pressed the seams open, then cut waves up the sides.  No hem needed because it's felted wool and as a seasonal table runner, it won't get used or moved around much.  I do think it looks better in person.  Hard to get a decent picture of the whole thing!

Wednesday, October 10, 2012

Making Halloween decorations


I love Halloween decorating, but right now our budget will not allow me to go to Hobby Lobby and stock up on a ton of cute stuff.  That really isn't my style anyway.  I like to make things.  Today I made these two Halloween buntings out of upcycled wool--one sleeve of an orange sweater, part of a black skirt, and a few other little scraps.  The only other materials were hot glue and embroidery floss I already had, so this project cost nothing!  I freehanded the letters, which was easier than I thought, glued them onto the rectangles with hot glue, and then joined the rectangles with a sloppy running stitch.  Easy!  I got the general idea for a trick-or-treat bunting on Pinterest, but lost the link.  Wait a minute, here it is!  Mine turned out quite different.


Since I used the rotary cutter to do the black rectangles and had extras, I figured I might as well make this little bunting too.  I'd still like to make at least a couple more decorations, preferably ones that can be completed in 20 minutes or less while I also watch the kids.  Or better yet, ones I can make with the kids!  Did you know that five-year-old Suzi is at her desk right now, busy as a bee drawing pumpkins and witches and ghosts?  She wants to decorate, too!  I love Halloween.

Tuesday, September 18, 2012

Thunder-Crush!


After watching Charlotte's Web a few weeks ago, Suzi insisted she needed a stuffed pig. She wanted to name it Wilburt. So we bought one with a little of our coin-rolling money. She enjoyed playing with Wilburt for a while, and then the other day asked me for some sweater scraps. She came back to show me her pig in a superhero mask. Then she cut an orange cape, which I sewed on for her, and named him Thunder-Crush! She does things like this all the time.

Life has been so busy and exhausting lately. It really has. But it is so worth it when I see how much more interesting things are going to get as my children grow. Holding a newborn is amazing, obviously. But when your babies get old enough to have ideas they can act on, and they begin to create, and can talk with you about what they think and why, that is even better. You finally get a sneak peek at the people they will become. It's like a gift from God that you get to open little by little over the years.

So during the difficult days that naturally come along quite frequently while homeschooling with a 17-month-old, 3-year-old, and 5-year-old, I take heart in the knowledge that it will only get easier and more fun from here. It's already happening!

Tuesday, September 20, 2011

Need a good reason to buy a serger?

Here ya go. It's an elf sweater coat tutorial by Katwise. You're welcome.

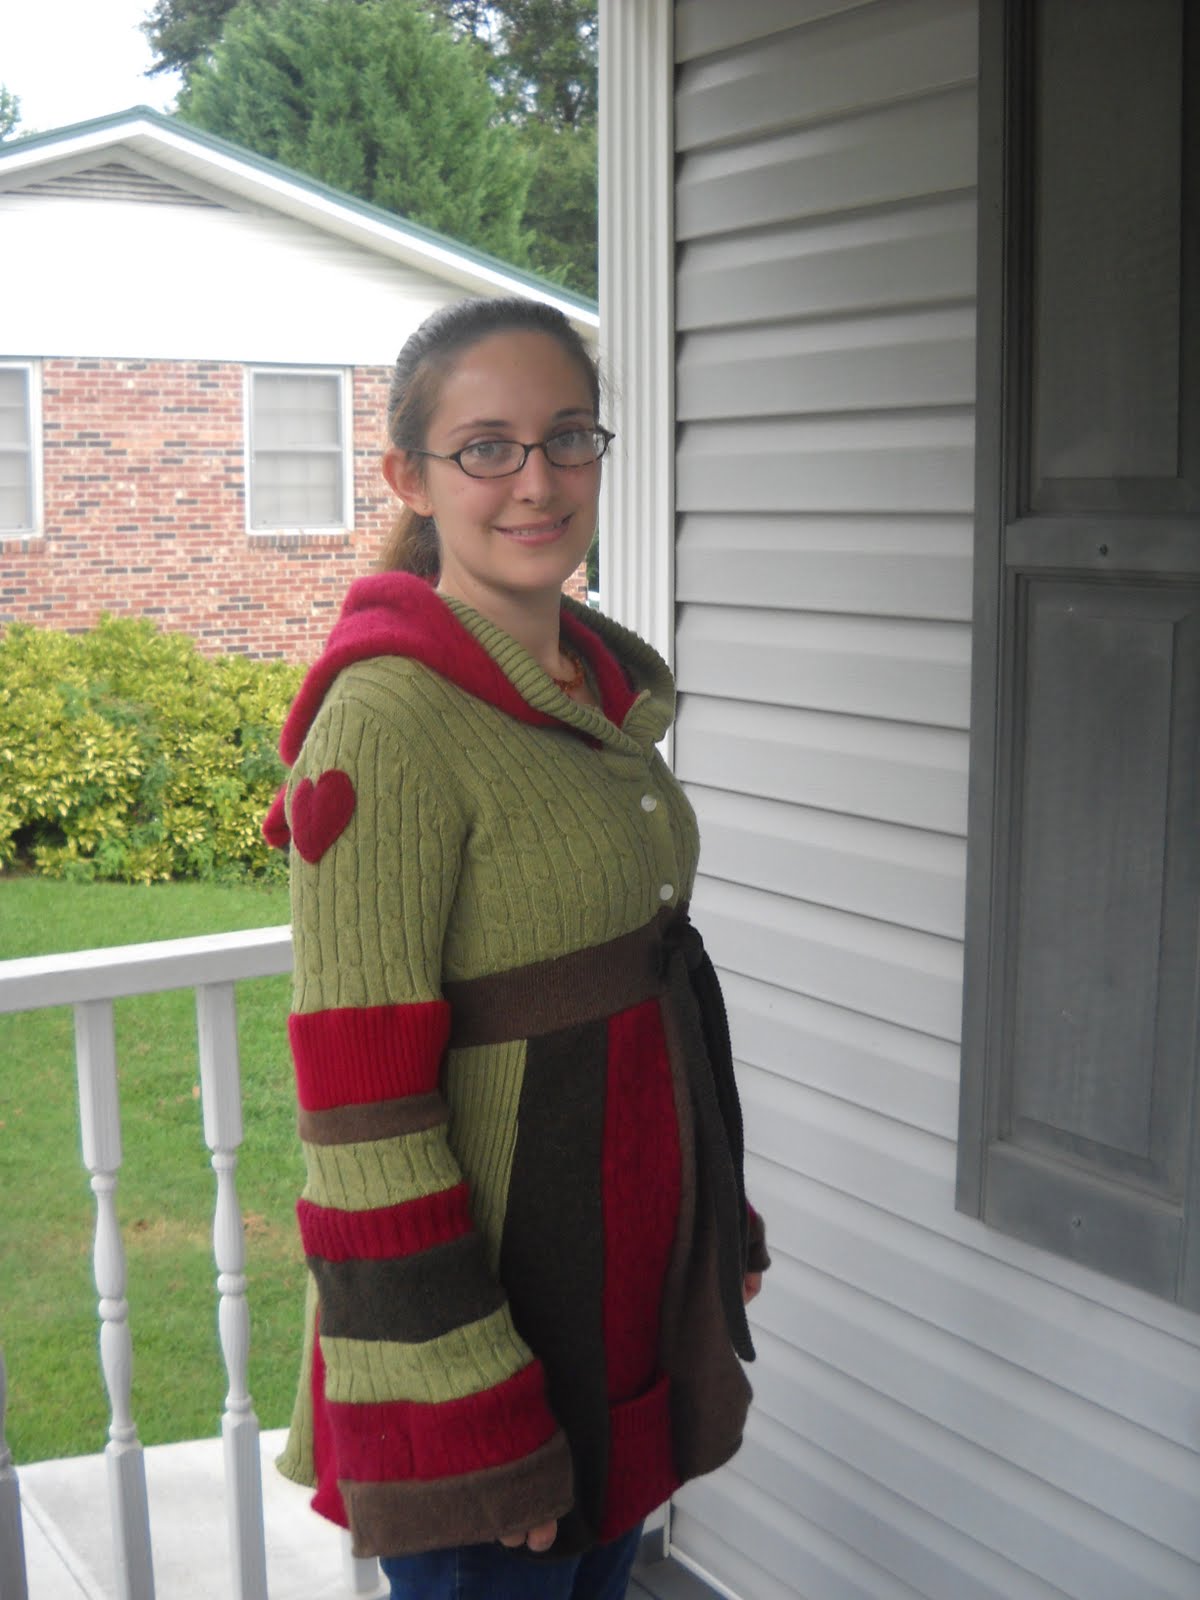
This is a coat I made just before the tutorial came out. I used my regular sewing machine and did some of it by hand.


I'm still happy with it. But here are some of the things Kat's tutorial has inspired me to make, in no particular order.


Seriously, if you enjoy sewing at all, especially thrifty sewing, buy that tutorial. It is so fun and inspirational and worth many times what she is charging!

In related news, I will be stocking an Etsy shop soon because I can't stop making stuff. Right now we are so close to finishing our flooring project, and all my sewing supplies are jumbled everywhere so I can't make anything. That is not a fun feeling for me. Also, the house is in such a state of disorder that I couldn't possibly homeschool in it. I am working to get it back to somewhat normal today and we will pick back up tomorrow.

But the new floor is lovely. We decided to go with laminate, after discovering how soft bamboo is. Our kids would've wrecked it in a heartbeat. We are just inches away from having the floor completely in (we need a whole new box because of a couple of damaged boards), and then there are a few finishing touches we'll do this week. But the nasty carpet is out--yay! And it looks so bright and new. I was inspired to move the furniture back to the walls to make more of an open space, and when I get my serger set back up, I'm going to make something new called a floor sled. Doesn't that sound fun?

I'll be back soon with pictures of the floor and the sled.