Sunday, February 13, 2011

How-to: Jewelry holder out of styrofoam packing material


Yesterday we realized we had to buy our kids a new humidifier. (We are still working on getting rid of this cold we've had for the past several weeks.) So we went to Target and got a cute penguin that really puts out some steam. This morning I noticed the two blocks of styrofoam packing material we were left with and thought, you know, I bet there is something you can make with that. I googled a little but mostly found styrofoam cup projects and things like that, and some of them involved melting the stuff in the oven, which I did not fancy doing because of the fumes. Since my jewelry box that Jordy gave me in college is getting crowded, I decided to try to make a jewelry display.

To make this you will need:

A piece of styrofoam
Some sort of loose-weave fabric--an old sweater will work, felting NOT required
Paper clips
Wire cutters
A needle and thread
A sewing machine (would expedite the process, but isn't totally necessary)
Scissors
A knife to cut the styrofoam, if it's not the right size

I started by cutting off the end of one of those blocks. It's smooth on one side, lumpy on the other, and that's okay. (It probably would be easier in the long run if you had a totally flat piece, but it's not required.)


I went up to our bedroom to see where something that size might fit, and found a good spot over our dresser.


Then I found a piece of fabric to cover the styrofoam with. I knew I wanted something with a loose weave (so metal can poke through easily), and something that would look good in our bedroom. I also didn't want it to be a busy pattern because I wanted my jewelry to be easy to see against it. I ended up using a sleeve of this cashmere sweater.


The sleeve was a little big, so I sewed down the edge of it to make it tighter. I didn't bother turning the sleeve inside out or changing the thread to a matching color or anything, because none of this was going to show.


So I slipped the sleeve over the styrofoam and it was a good fit. The fabric was stretchy and forgiving.


Then I wrapped the edges back sort of like a present and sewed them down. You don't have to do a neat job of this, because it'll be on the back. Just make sure the front looks smooth.


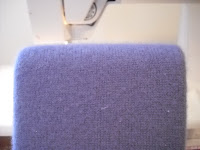
Once you are done with this, you'll want to pick the lint off the front if there is any. There was on mine.

Seriously, I didn't go to any trouble making it look nice on the back. But it did look smooth on the front.


And then you are going to need a handful of paper clips (medium or large, preferably some of both) and some wire cutters.


Just fold out each paper clip like this.


And then cut it into two pieces like these.


I liked to have a couple of pairs of earrings handy to help me figure out spacing. These are some of my favorites right now. Can you tell what they are? :-)


Then you stick the cut up paper clips into your jewelry display, and those will hold your dangly earrings! Post earrings can just be stuck directly into the display.


I also used some straight pins, stuck in at an angle, to hold necklaces and bracelets and things. Just know that the styrofoam has limits, and don't try to hang anything too chunky or heavy.


I have to admit that hanging this thing on the wall was tricky and Jordan finally figured it out. This is the part that would be easier if you had a piece of totally flat styro. Eventually, we bent a large paper clip loop just like the ones used on the display at an angle so that it was poking up into the back of the display. We stuck it in about the middle of the back so it wouldn't show at the top, and hung it on a picture hanger. I think it is going to stay up. I hope so anyway. I think it would also look nice if you had some pretty matching ribbon and wanted to make a decorative hanger out of that.


And now I can see my jewelry! Now maybe I will change my earrings every once in a while.

Monday, February 7, 2011

When we get sick it takes at least two weeks to recover

Jordan came down with a horrible cold last Sunday. I am guessing it probably came from work. He does computer support, and people's keyboards are disgusting as you probably know. So he stayed home from work Monday with a fever and all, and slept until 11:00. I tried my best to keep the kids off him. He had it all week long and is just now starting to get over it. His grandmother died last week and it was awful for him having to go through that loss, and the funeral and everything, feeling awful with a cold and fever. We probably would have stayed at his parents' longer but because he was sick and I wasn't feeling great either we decided to come home Friday night. It was good to be home and we didn't really do anything Saturday.

I realized yesterday that Ivey and I definitely had it and today we both feel disgusting. Suzi is coming down with it too, but right now it's just a bad runny nose. This morning we went to get our taxes done (which cheered me up, I must say!) but then I dropped Jordan back at work and picked Suzi up from my mom and dad's and at that point it was only about 10:00 and I have the whooooole day to look forward to snot, snot and more snot. Sneeze-rocket snot from Ivey. Plus grumpiness. Plus fighting sisters. I usually put a movie on for Suzi when this happens, like I just did, but Ivey doesn't watch TV. She does, however, love to turn the TV on and off so that while I am in the kitchen trying to heat up some chicken and rice soup, Suzi is yelling "Mommy! Mommy!!! The TV is off! Okay now it's on! Ack! It's off! Help help!" And then Ivey leaves the TV alone but doesn't waste any time finding something else to get into.

This is our third crappy week. Week before last we weren't sick but we had to waste a bunch of time at the DMV on two different days doing paperwork on our cars. I'd really like to get back to our normal schedule, and get my normal stuff done. Since I am now 32 weeks pregnant it's time to start working on things for the birth! I'd even love to go to a playgroup, but quite honestly, once my family is feeling good again I'll be afraid to attend too big a meeting. There are always seven or eight sippy cups sitting around at those and Ivey thinks it is her duty to have a drink from all of them. As fun as it is for me to chase her around making her cry by snatching other kids' cups away, boy oh boy is it easier to just stay home.

And I know most everyone is going through this same type of thing, and it is just this time of year. I am so sick of winter. It sucks. And on that note, I'm off to see how little I can get away with doing until Jordan gets home at 5:00.

Update: Suzi has it bad. Poor little girl! Fever, hoarse voice, puffy eyes, snot. Jordan is putting her in bed right now, and I just hope she feels better in the morning :-(

Thursday, February 3, 2011

31 weeks? Time for a pregnancy update!


I can hardly believe it, but I am 31 weeks and 5 days today. Baby Robert could be here in a couple of months! I'm not envisioning a due date, because I want to enjoy the end of my pregnancy, but mid-April. Sometime in there. Right now I am enjoying an icy glass of extremely lemony water. If it had sugar it would be lemonade. Sorry for the uncropped photo.

There are so many things to say about this pregnancy that I know they won't all fit into one post. Here's a start.

1) Hypnobabies. Jordan and I have had two babies and two childbirth classes--the hospital one and a really good one that promoted natural childbirth, taught by a doula. We weren't sure if we should take another class or not, but finally decided to sign up for Julie's Hypnobabies class. While a lot of the childbirth information has been a review for us, the relaxation techniques are awesome. I have to admit I didn't see how the "positive pregnancy affirmations CD" was going to help me, but I think it has, and I haven't even listened to it every day like I'm supposed to. Not nearly. I love the scripts too, but it's been hard to find time to do them. We haven't practiced Hypnobabies in the recommended fashion, but I think it'll still be what we need it to be. If I were having a hospital birth I'd probably have been more serious about carving out time for it every day.

2) Paranoid! I really haven't been bad this time around. With Ivey I worried over every little remote possibility for things to go wrong, but until a couple days ago I'd made it through this pregnancy almost totally worry-free. (Except for the first trimester when I kept thinking I might not really be pregnant.) Anyway, remember how the last two times I kept getting comments about how big I was? Well, this time I had been getting comments about how small I was. I had noticed the same thing myself, but figured it was a good thing, because I had still gained a normal amount of weight and have been getting more exercise this time and I felt fine! Then I read this about a woman whose baby might have had IUGR (but he was actually fine). And then to make myself feel better I decided to try and measure my own fundal height, and got 27, when it is supposed to be about the same as the number of weeks pregnant I am. So I got worried that Robert is just TINY! And they are going to want to induce!!! And it's all my fault his growth is stunted because I didn't completely give up coffee! I called Carey and she came over and measured. Turns out I was measuring to the top of his butt and not to the top of my uterus. I feel better now :-)

3) Happy! I feel great about this birth. I worried about the last one, but I'm not worried about this one, because it's going to be the most beautiful, wonderful home water birth ever. I'm truly excited about the process. I think it's partly that I had one homebirth that went well, and partly the positive pregnancy affirmations. I am serious, they work.

4) Hungry for sugar. I don't know why I haven't been able to lay off the chocolate. Other than eating too much candy and stuff, my nutrition hasn't been bad. I've added Cal-Mag Fizz and ChlorOxygen to my supplements this time around. Love those! I don't mind eating enough vegetables and protein, especially if somebody else fixes it for me, but restricting the things I want has been hard! I've been hungry, too, and I must be burning those calories off running all over the place after the girls, because like I said, I'm smaller this time.

5) A little emotional. Pregnancy intensifies whatever I am going to feel. I'll be really excited, or a sort of cute joke will be hilarious and I'll laugh for 15 minutes, or, on the other hand... I won't be able to do all the housework and I'll spend an entire day convinced I am a totally useless drain on society and Jordan will have to talk me down when he gets home. Ha. That was a bad day.

6) Crafty and nesty. I've enjoyed the third trimester nesting and crafting energy I've had. It's going to be sad when it's gone!


That's it for today. I need to post soon about some birth craft projects and our plans for the big day.

Monday, January 31, 2011

How (I like) to sew sweater flowers


After trying a no-sew, no-glue sweater flower approach, I decided to branch out a little. I enjoy sewing and this is one of those projects for which you don't need a sewing machine or fancy stuff or a lot of space. Anyone can do this with just an old sweater, a needle and thread, and some scissors.

There's no end to the different ways you can make a sweater flower. Lots of people have done it. Lots of people sell them. I honestly have no idea who did it first, but one link trail on the spiral method led me back to something Martha Stewart reportedly made out of paper over a decade ago. I think I will start with links to some of my favorites that others have done...

June Pfaff Daley shows how to glue spiral method flowers
This brooch tutorial from Betz White is just awesome

My first attempt at a sweater flower was the spiral method. It seemed the easiest. Start by cutting a spiral from a circle like this.


Then you could wrap it starting from the outside (that little point can be cut off later).


Or you could start on the inside, for a different look.


For this one, I decided to go back and cut wide, irregular notches all along the spiral (but you could do rounded petals, slits, or whatever).


This is how it stacked up pre-sewing.


One thing that's important to me while sewing is that the thread is *not* doubled. This will allow you to pull the needle off when you are done and start on a new flower, and when you decide what you want to sew your flower onto you can re-thread the needle with that already-attached thread and you're set. Anyway, when I sewed it I jumped all around the flower, sewing over and behind a layer here and there. This pinches the fabric down and gives the look of individual petals without extra cutting.


It ended up like this. This is pretty much what I have, in red, on my Valentine's shrug. On most of those I cut a really big spiral but didn't go all the way to the center of the circle. This makes it so the flower doesn't look so flat in the middle, and to me it looks more rose-like.


All the flowers I've made so far have been different, because all of them have been improvised. Sitting down with a bunch of pretty colors and the scissors and just experimenting for an hour or two is fun! There are thousands of possibilities.

You could cut off the bottom edge of your sweater...


And make a little roll for the center of your flower.


And then you could cut some petals like this...


And roll it up so it looks nice and sew through all the layers, from one side to the other, back and forth until there are stitches around the whole thing.


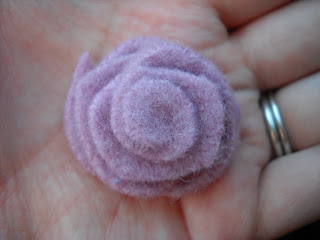
Which would turn out about like this.


You could fold up one of those leftover circle pieces...


And roll it to make a center like this. (Ha! There's Jordy driving. You can even do this in the car; I did!)


And add pointy petals like these...


To create this.


You could use multicolored sweaters.


You could use several different sweaters that are all different colors. You can add leaves or not (this one is a pin I made for someone recently).


A button or bead could make a pretty center for your flower. You can keep adding petals until the flower is huge!

And then there are all the different things you could decorate with those flowers. Aside from the obvious headband/hair clip, I plan to completely cover the inside of Baby Robert's plaster belly cast with them, and then lay him in the middle of all those flowers and take pictures. I'm also stashing a bunch of flowers to decorate various handmade Christmas gifts for next year. Gotta get ahead!

Anyway, there are endless possibilities and this is a fun creative project to try out while we wait for spring. So get yourself some shrunken sweaters and get started!

Friday, January 28, 2011

Valentine's Day upcycled sweater shrug


As I was felting up my latest batch of thrifted sweaters, I came across this light pink one that was cashmere and so soft. Because cashmere never seems to felt well anyway, and it was my size after washing and drying, I really wanted to wear it.

Except... Hole.


And? Belly.


So I decided to try making something that would take care of both those problems and turn the sweater into something I could wear. A flower-embellished shrug! First I put the sweater on and cut a little hole to get it the right length for me.


And then I took it off, laid it flat on the cutting board and sliced it off evenly.


So I had this to work with, and I cut a line straight up the middle in the front.


I picked it up with those cut edges together and laid it back on the cutting board.


And I cut it evenly on both sides, like this.


Then I rounded things up a bit.


Next I had to hem around it. Because cashmere, as I said, usually doesn't felt well, it was necessary to roll the edge under so no raw edges were hanging out after it was sewn. While I was at it I stitched up the hole in the neckline. All this took a few minutes, but I like to save time by threading as many stitches as I can on the needle at once.


I had to put some tucks in the back, because otherwise it would've been too loose at the bottom. I just folded in about an inch or less in two places on the back, and then stitched up the dart that each one made.


The buttonhole is the one thing I wish I'd done differently. I need to work on my buttonhole skills, because I have none. I wish I'd done a tie or something instead, but I decided to cut a buttonhole and use one of the flowers as the button. I made the flower and sewed it on first, so I'd know what size to make the hole and where to put it.


It looked kinda funny with just those two roses (one covering the hole and one for a button), so I kept adding more until it looked right.


The flowers, by the way, are easy and fun to make. I just thought adding pictures of that would be too much for one post. I'll post about how I did that in a day or two, but if you need to know now you can google "how to sweater flower" and hit images and get a ton of ideas. It's nothing that hasn't been done before. All the flowers I made for this sweater were some variation on the spiral method, and you get different results depending on how you cut. It's fun to experiment.

I'm glad I did this project because it affirmed my belief that success starts with scissors. Even if I ruin a bunch of craft supplies and turn out a finished item that's totally embarrassing, I learned something. I'm one step closer to making something that is decent. I am going to have to post a picture of my multicolored upcycled wool poncho attempt from last week. Scary!

But this time I actually ended up with something I'm not afraid to wear! So go ahead and make that first cut even if it might be wrong.


P.S. I decided to enter this project in a fun contest:


One Month To Win It